
"True art is an expression of the human being's search for a relationship with the spiritual, whether the spiritual longed for when his soul leaves the body, or the spiritual which he desires to remember when he dips down into a body, or the spiritual to which he feels more related than to his natural surroundings, or the spiritual as manifested in colors when outside and inside lose their separateness and the soul moves through the cosmos, freely, swimming and hovering, as it were, experiencing its own cosmic life, existing everywhere; or ... the spiritual as expressed in earth life, in the relationship between man's soul-spirit and the cosmic ... " - Rudolf Steiner
Course WC/ART
Art of Needle Felting
Lesson 3
|
Course Outline
Art of Needle Felting
Lesson 1: Getting Ready for Felting Lesson 2: Simple Projects for Children and Beginners 1 Lesson 3: Simple Projects for Children and Beginners 2 Lesson 4: Projects for Experienced Felters 1 Lesson 5: Projects for Experienced Felters 2 |
Introduction
Using a single, barbed needle borrowed from commercial
felting machines, wool fibers are tangled and compacted by repeatedly jabbing
the needle into the fibers, forming three-dimensional felt sculptures bound
only by one’s imagination. In contrast to traditional felt making methods
that use water and friction, needle felting is also known as dry felting. Sculptural Needle Felting
is just the coolest thing! First of all the medium is wool ...
Let's thank the sheep for growing such amazing fiber. It is really hard to
describe the feeling of creating with wool. It must be the organic nature
of it that appeals to us; the luster, the smell, the feel ... it really is
wondrous stuff. The quiet crunching sound that the barbed needle makes as
it pokes in and out of the wool is quite soothing. But the greatest thing
of all is the moment that lustrous pile of fluff transforms into a character
full of charisma and charm. The needles used for needle
felting were not designed for hand crafting - they are designed for
industry. At the turn of the 20th century, machines with beds of these
barbed needles were invented to tangle fibers into felt fabric. These
machines are still being used today to make industrial felt out of a wide
variety of fibers.
The felting needle is a long, sharp, three- or five-sided barbed instrument. This needle is the tool used for sculptural needle felting. Felting needles come in a variety of gauges from fine to coarse and they vary in the number of sides on the bottom shaft. The sides of the needles have tiny barbs poking out. Store your needle in a safe place when not in use, for instance poke the needle deep into the side of the foam pad. The foam pad is another item you will need. You need this pad to absorb the needle when it penetrates through the wool. The best kind of foam pad to be used for needle felting is high-density foam that is at least 1 1/2 inch (3.8 cm) thick. There is a variety of fibers available and all can be needle felted with some success, but the best material for this purpose is sheep's wool. Sheep's wool fiber has scales on it. When you poke the felting needle into the wool, the barbs on the sides make contact with the scales on the wool and cause them to tangle together; that is the effect you are looking for. The more you poke, the more compact the wool fiber becomes. Basic procedure: Place the wool on the pad and keep needling without worrying about poking your leg or breaking your needle.
The felting needle is a long, sharp, three- or five-sided barbed instrument. This needle is the tool used for sculptural needle felting. Felting needles come in a variety of gauges from fine to coarse and they vary in the number of sides on the bottom shaft. The sides of the needles have tiny barbs poking out. Store your needle in a safe place when not in use, for instance poke the needle deep into the side of the foam pad. The foam pad is another item you will need. You need this pad to absorb the needle when it penetrates through the wool. The best kind of foam pad to be used for needle felting is high-density foam that is at least 1 1/2 inch (3.8 cm) thick. There is a variety of fibers available and all can be needle felted with some success, but the best material for this purpose is sheep's wool. Sheep's wool fiber has scales on it. When you poke the felting needle into the wool, the barbs on the sides make contact with the scales on the wool and cause them to tangle together; that is the effect you are looking for. The more you poke, the more compact the wool fiber becomes. Basic procedure: Place the wool on the pad and keep needling without worrying about poking your leg or breaking your needle.
Supplies Needed
You will need the following supplies and you may substitute some supplies as needed and appropriate depending on your projects and supplies on hand:
- barbed needle felting needles
- foam pad
- white and colored merino wool
- brown or rust mottled, white, black and yellow merino wool (0.07 oz or 2 g of each color)
- variety of different colored merino wool depending on choices
- small amounts of yellow, red, brown and black wool
- black beads for eyes
- sewing needle and thread
- wooden skewer
- ruler
- additional supplies and items as needed depending on choices
Supplies can be obtained for instance at livingfelt.com or geminifibres.com or other suppliers.
Tasks and Assignments for Art of Needle Felting Lesson 3
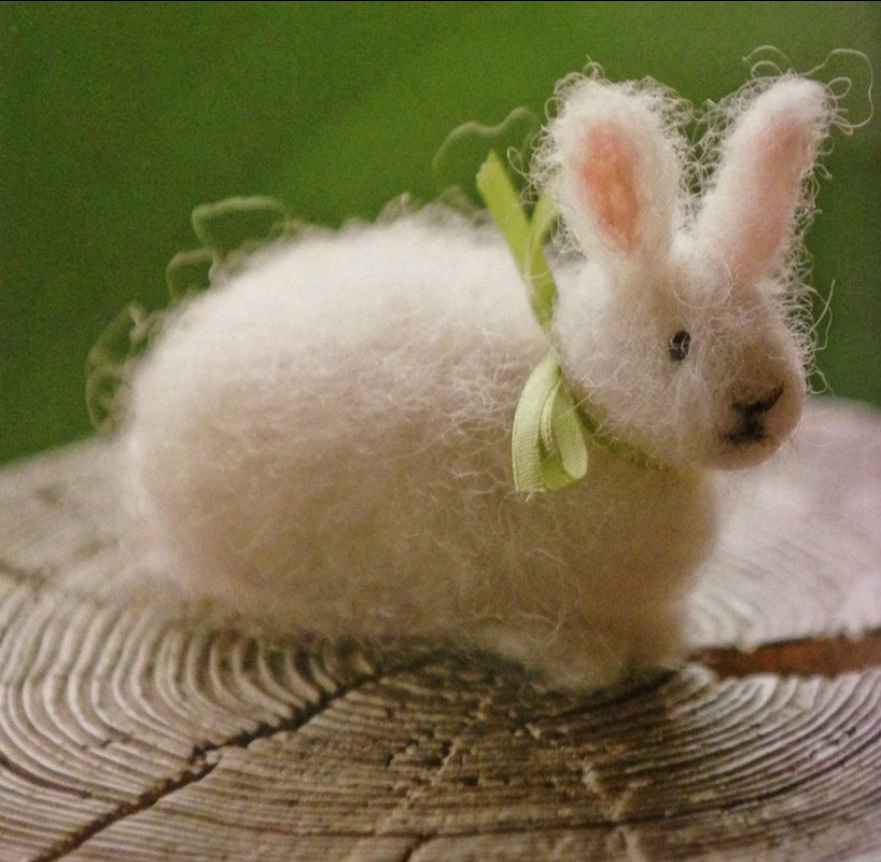
Bunnies
Obtain the basic materials for your third project: several bunnies.
- barbed needle - foam pad - white, gray and black merino wool (0.2 oz or 6 g of each color) - small amounts of white, black and pink wool - black beads for eyes - sewing needle and thread - ruler |

|
Body and Head of the Bunny
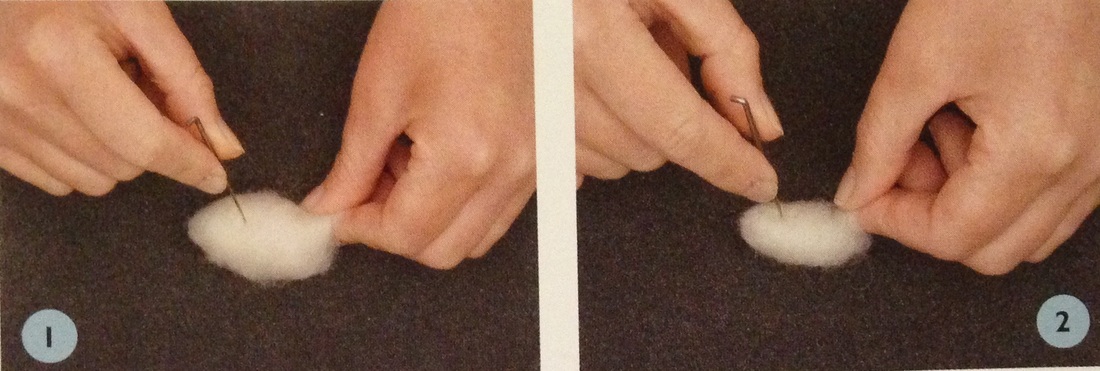
1. Measure a 10" x 2" (25.4 x 5.1 cm) piece of white wool. Roll into a 2 1/2" (6.4 cm) long sausage shape. Needle the surface to keep the wool in place and shape the body.
2. Measure a 4" x 2" (10.2 x 5.1 cm) piece of white wool and roll into a 1" (2.5 cm) long cone shape. Needle the surface to keep the wool fibers in place and shape the head. Keep the fibers loose at the wider end of the head to help attach it to the body.
3. Needle the loose fibers of the head to the body. Turn the bunny upside down and needle from the bottom of the body up through the head. Add more wool around the neck and needle to smooth the space between the head and the body.
|
|
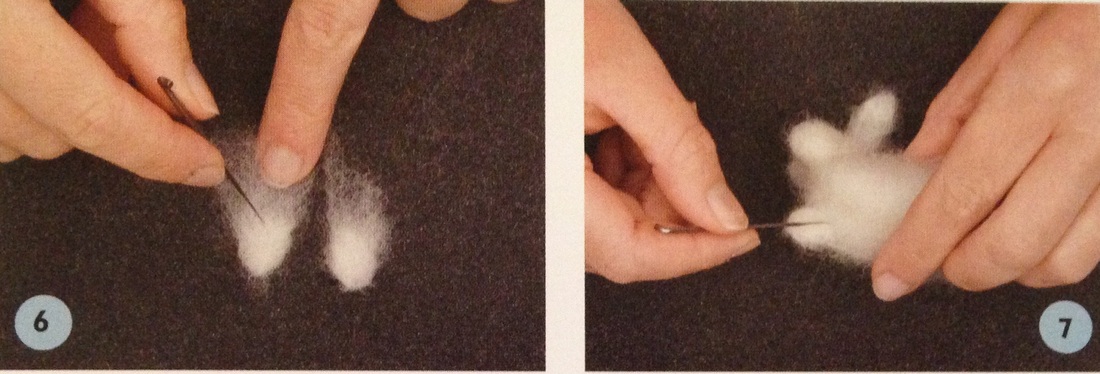
Ears of the Bunny
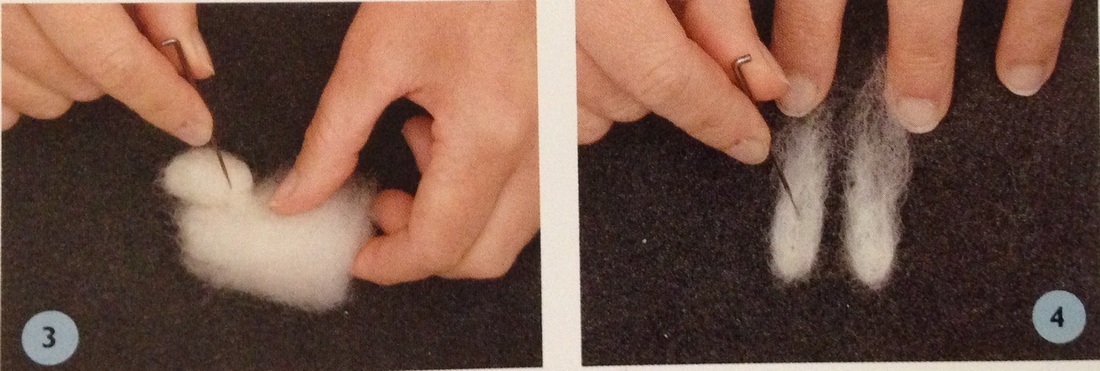
4. Fold a thin strip of white wool in half. Pinch the fibers together at the loose end, but don't needle them. Each ear is 1" (2.5 cm) long. To give the ear a natural curved shape, needle from the edge of the ear towards the middle. Make two ears.
5. Attach the ears to the head by needling the loose fibers at the base of the ears. Needle deeper at the inside bottom of the ear.
|
|
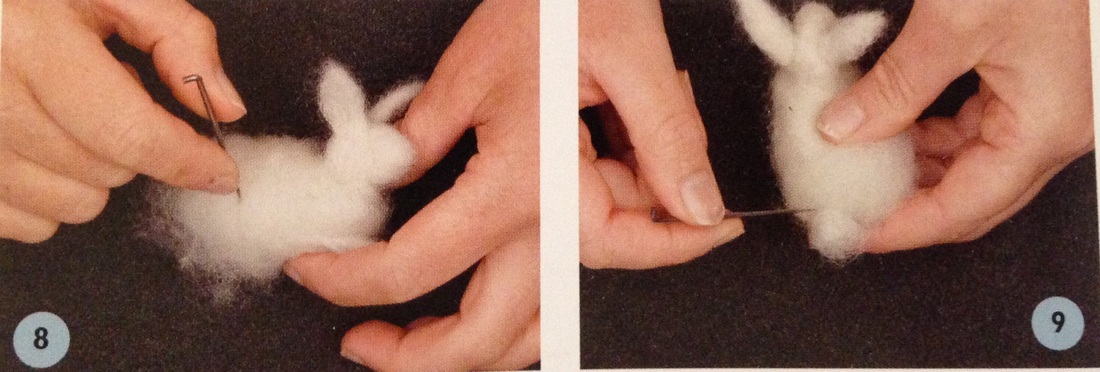
Front Paws and Tail of the Bunny
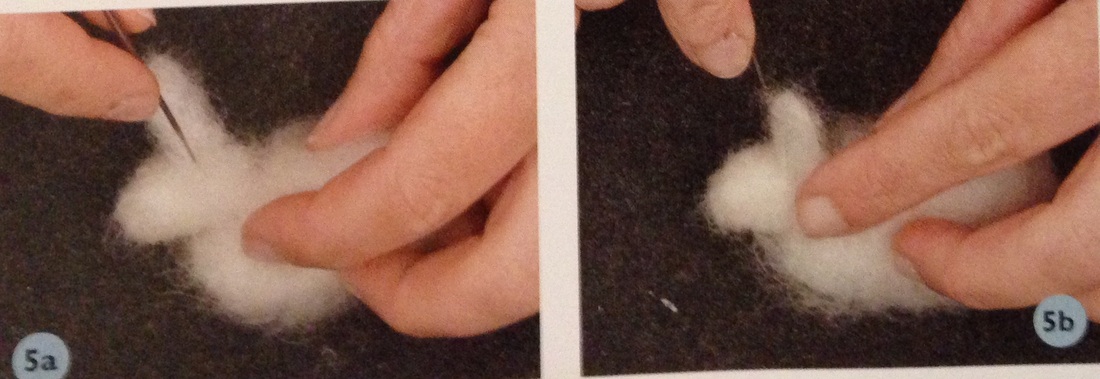
6. Needle a piece of white wool that is about the size of a thumbnail into an oval shape. Leave the fibers loose at one end for attaching the paw to the body. Make two.
7. Position the front paws to the underside of the body. Needle the loose fibers of the paws onto the body to attach them.
8. Add a little extra wool to the back end of the body.
9. To make the tail, needle a small tuft of white wool to the back of the bunny.
|
|
Face of the Bunny
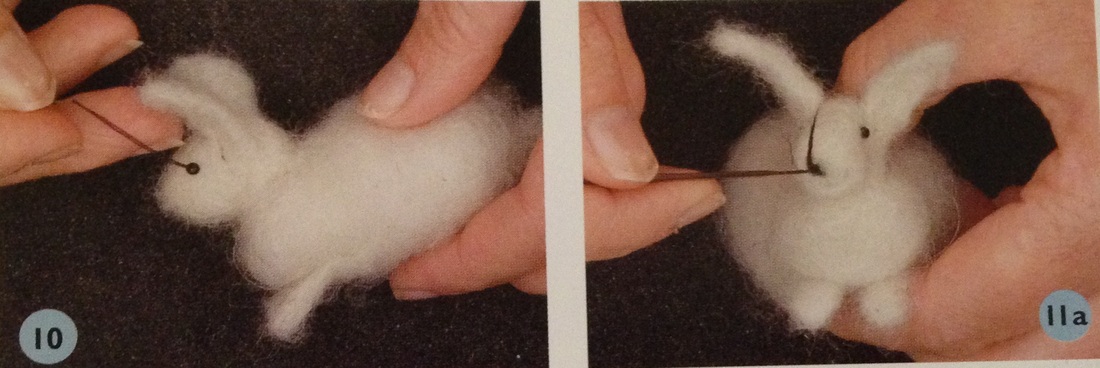
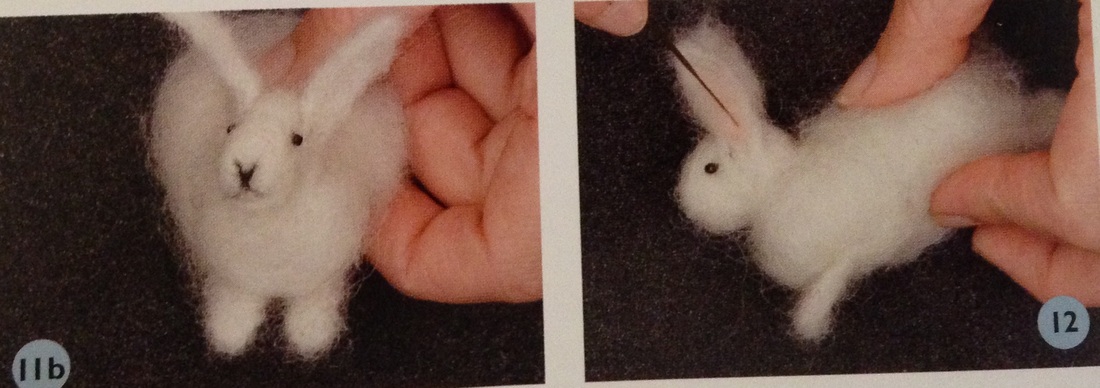
10. Sew a black bead on each side of the head of the bunny.
11. Needle a thin strip of black wool down the middle of the bunny's snout. Split the fibers above the line into a Y shape and needle. Cut off any excess wool. Split the fibers on the bottom of the line into an upside down Y shape and needle. Cut off any excess wool.
12. Needle a pinch of pink wool on the inside of the bunny's ear. Repeat on the other ear.
Additional Bunnies and Display
13. Repeat the appropriate steps to create another bunny using gray wool.
21. Repeat the appropriate steps to create a third bunny using black wool.
22. Arrange your creations for a nice group photo and/or set up a nature display table in your house or studio using props like a colored ribbon and some firewood.
|
|
|
|
|
|
Please submit photo(s) of completed art project(s), comments and questions via the online form or via email.